|
|
Post by Ed Hume on Mar 11, 2013 9:49:32 GMT -5
I am happy to report that I have completed the boiler for a scaled down version of Kozo's New Shay. I have been posting photos on flickr of the build and I have collected them into a Set. The Set URL is www.flickr.com/photos/edhume3/sets/72157632966817240/I have some suggestions to improve the odds of success which are shown in the photos. The door was turned with a larger diameter inside to create larger joint surfaces and to help fix the joints. I flared the smoke tube ends to lock them into the firebox openings. I made hex staybolt nuts for better control over tightening and I dimpled the staybolt nuts with a prick punch to provide better control over the joint gap. 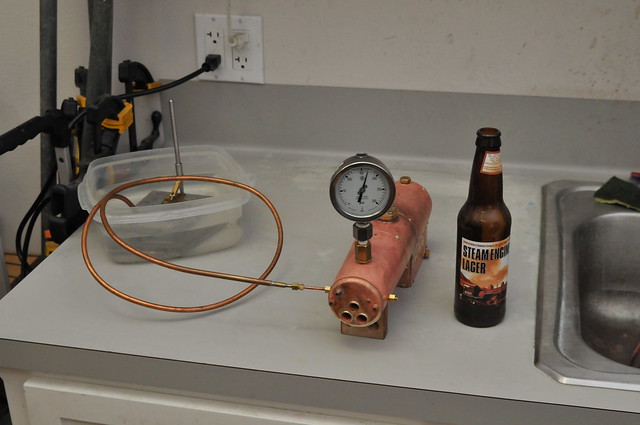 Happy Boiler Day Happy Boiler Day by edhume3, on Flickr |
|
|
|
Post by phutcheson on Mar 11, 2013 16:01:55 GMT -5
Ed, Congratulation on your successful completion.  Can some (if not all) of your modifications be applied to the A3 boiler? That's where I'm at ... the boiler. After following all your postings I'm really concerned about me being successful building it. One little miss ...  A couple of questions: Found this on your Flicker post... "Now that the tubes are locked into the holes, there is no need to bind the tubes to prevent slippage. A mix of BAg-1 and higher temperature non Cd solder is being used." The use of non CD, I believe, is something new for you. Did you do that for all soldering or just in spots where you wanted to be absolutely sure that there would be no solder melting? Can you go into more detail on that? Thanks, Pat H. |
|
|
|
Post by Ed Hume on Mar 12, 2013 9:10:14 GMT -5
Hi Pat,
Yes my suggested tweaks can be applied to the A3 boiler. Because the A3 boiler is way larger than the boiler I built, there are fewer problems with damaging the existing joints when installed the staybolts. However, the tips will increase the likelihood of success.
The most important tip is to avoid trapping flux underneath the staybolt heads or nuts. The flux should be watery - something like skim milk. As applied with a brush it looks watery and clear. Only as it dries do you see that a fine white powder has been applied.
Because the level of heating is very high for staybolts, the areas on top of the staybolts and around the edges where the flux is directly exposed to torch flame can be fluxed more heavily. If you were to optimize the fluxing, you would start with watery and thin for the shielded joint surfaces - flux and screw them all down. Then you would thicken the flux to apply to the exposed areas.
The non-Cd solder I used was from McMaster-Carr. It is 45% Ag, 30% Cu and 25% Zn with a melting range of 1225-1370F vs 1125-1145F for BAg-1. This solder has its uses - it will fill a larger gap than BAg-1 and stay put for reheatings. However, you have to heat the solder up substantially more than with BAg-1 and you can easily damage BAg-1 joints when heating for this solder. I used a mix of this solder and BAg-1 for the firebox seams, the smoketube firebox joints, and the throat joint to help them be stable for the staybolt soldering later in the process. When you use this solder, you have to use enough of it to spread and infuse into the BAg-1 so you are not left with damaged BAg-1 from excessive heating. You play a game where the BAg-1 spreads and wets the joints and then the non-Cd solder melts and runs where the BAg-1 is. The BAg-1 acts like a spreading agent for the higher temperature solder.
Kozo is able to use only BAg-1 by applying skillful heating and having only small joint gaps. With each heating of BAg-1, some of the Cd is driven off or spread so an older joint has a higher melting temperature than a new joint. When you have a lot of BAg-1 in a large joint gap, it is able to melt and flow out of the gap since the Cd is not depleted and it is not secured by surface energy/capillary action. This is a beginner problem - they do not realize how critical tight joint gaps are, and that the solder will flow out of the gap on later heatings. A beginner can fix a large joint gap by plugging with braided copper and more BAg-1 solder, or mixing some non-Cd high fill solder and not overheating. You can buy braided copper from Radio Shack or electronics stores as "Solder Wick" which is used to remove soft solder for circuit repairs.
My Gauge 1 shay boiler has a firebox opening that is only 1.5" wide and almost 3" deep. It is way more challenging to solder the inside staybolts for this boiler than for the 3-1/2" gauge A3. Many A3 builders have been able to build the boiler on the first try.
|
|
|
|
Post by phutcheson on Mar 15, 2013 12:22:07 GMT -5
Thanks Ed for your input ...
I've started to collect the wood needed and I have had the copper sheet for year or so.  Now I'm getting ready to carve it up! Now I'm getting ready to carve it up! 
Be ready for additional questions! 
Looking forward to your progress ...
Pat H
|
|


 Now I'm getting ready to carve it up!
