|
|
Post by GregMiller on Jul 11, 2009 13:57:08 GMT -5
|
|
|
|
Post by pkastagehand on Jul 13, 2009 8:55:03 GMT -5
Looks good!
I guess I should think about a few more pics of progress. I haven't done a lot since Christmas time but I do have a bit more done I could shoot and post.
Had to look up Chatham on the map. I was born/raised on a farm north of Marseilles IL but couldn't remember where Chatham is. I'm in SW MI now.
Paul
|
|
|
|
Post by grege on Jul 13, 2009 18:40:49 GMT -5
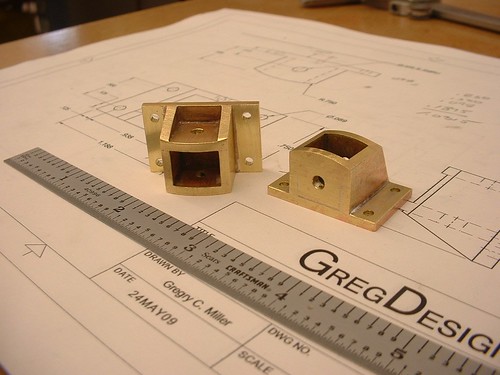
Nice work Greg! Thanks to your inspiration- I went ahead and made poling pockets for my A3a. I did them all at an angle, as I wasn't sure about tapering the front beam. 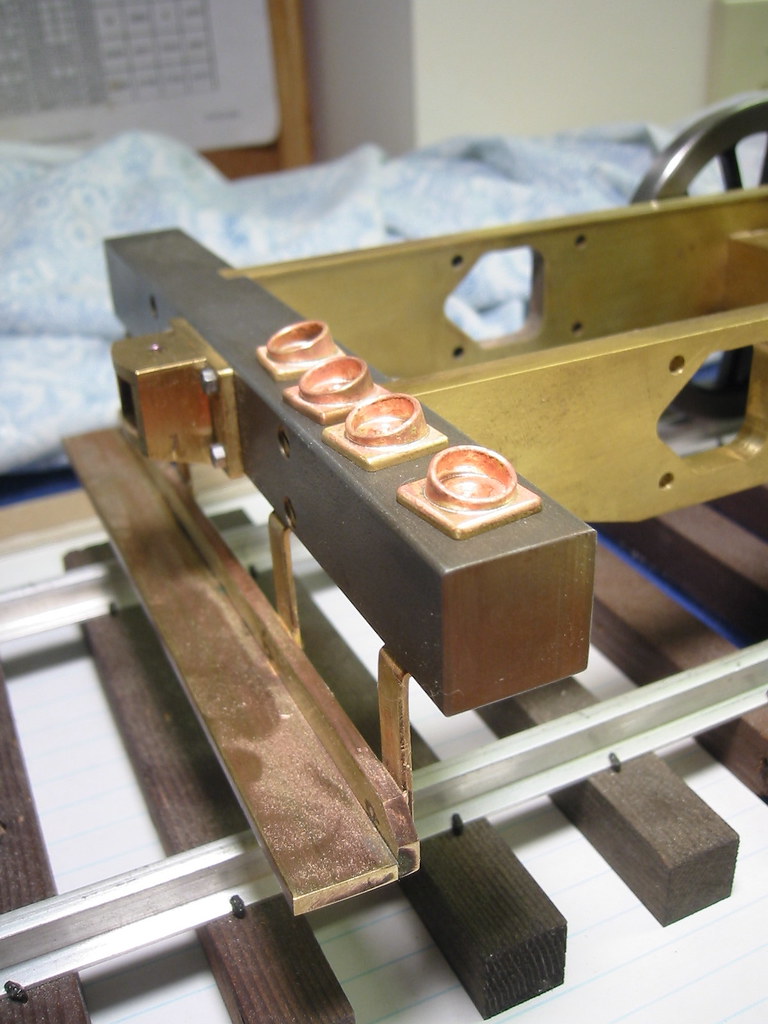 |
|
|
|
Post by GregMiller on Jul 13, 2009 21:57:48 GMT -5
Hi GregE,
Your poling pockets look great. How did you put the radius on the edges? File, rounding bit, both, other? They ALL look great.
In order to taper the front beam, I had to move the foot board brackets. Looks like you have decided not to have foot boards on the back side of the front bumper?
Once I get the holes drilled and tapped for the foot boards, it is on to the side frames! What length did you end up with for the side frames? I have mine at 18 13/16.
Thanks,
GregM
|
|
|
|
Post by grege on Jul 14, 2009 8:24:08 GMT -5
I did the radius for both the cylinder ends and the square plates with a little filing and then abrasive papers.
I ended up with 18-11/16" between the end beams, plus insertion distance into the beams.
The prototype photo of 5076, and the Kalmbach drawings didn't show a footboard on the back of the front beam, so I left it off- a tiny bit less work! I'm planning to leave off the stainless corner posts too, but maybe add the coupler cut levers front and back.
|
|
|
|
Post by kenrinc on Jul 16, 2009 17:14:10 GMT -5
Nice work Greg. I had made the same observations that you had about the footboards and the pilot beams on the prototype. I didn't care for Kozo's choice of using that detail. Sort of atypical even though it looks to be correct on that old photo. But Kozo took quite a bit of license, the valve gear is the most obvious. Also, most of the standard switcher type pilots on the Pennsy were tapered end w/pole pocket (like yours) and not round. Just a few of the things that have bugged me that I will be doing my own way. I'm not really trying to follow the prototype, I'm an SP fan to the core, but it's important to have a base project to work from. So this is just my first engine to get me to my ultimate goal :-)
Ken-
|
|
|
|
Post by pkastagehand on Jul 20, 2009 10:19:21 GMT -5
Not intending to steal this thread but just to share my progress since others have; here is where I am at the moment. Tender is mostly done; just a few details left, like the last of the plumbing and the light. Frame for loco has cylinders and steam chests and tee (not shown in photo), yokes, main and side rods. Progress has been slow this spring; too much else distracting me.   Paul |
|
|
|
Post by GregMiller on Jul 23, 2009 19:31:33 GMT -5
Hi Paul,
Looks like you are making great progress, especially with the tender almost complete.
No problem hijacking the thread, it good to see the progress of other builders.
Greg
|
|
|
|
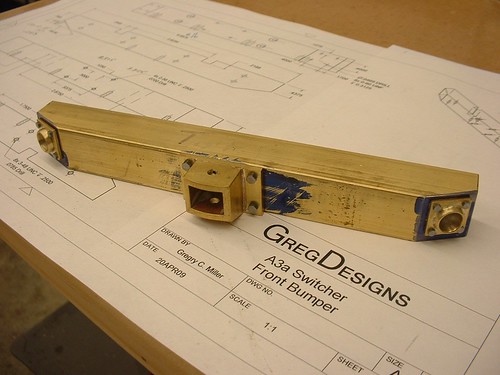
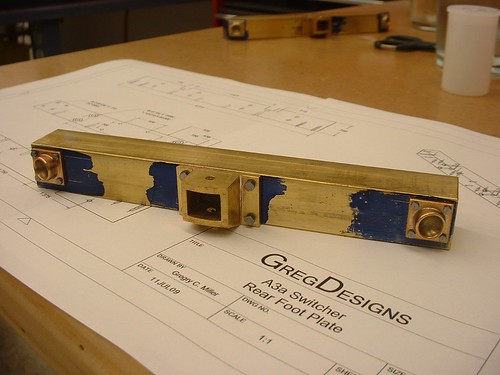
Post by GregMiller on Aug 4, 2009 21:28:43 GMT -5
Completed the Front Bumper and the Rear Foot Board over the past weekend. I'm happy with the results and looking forward to starting on the frames. Front Bumper 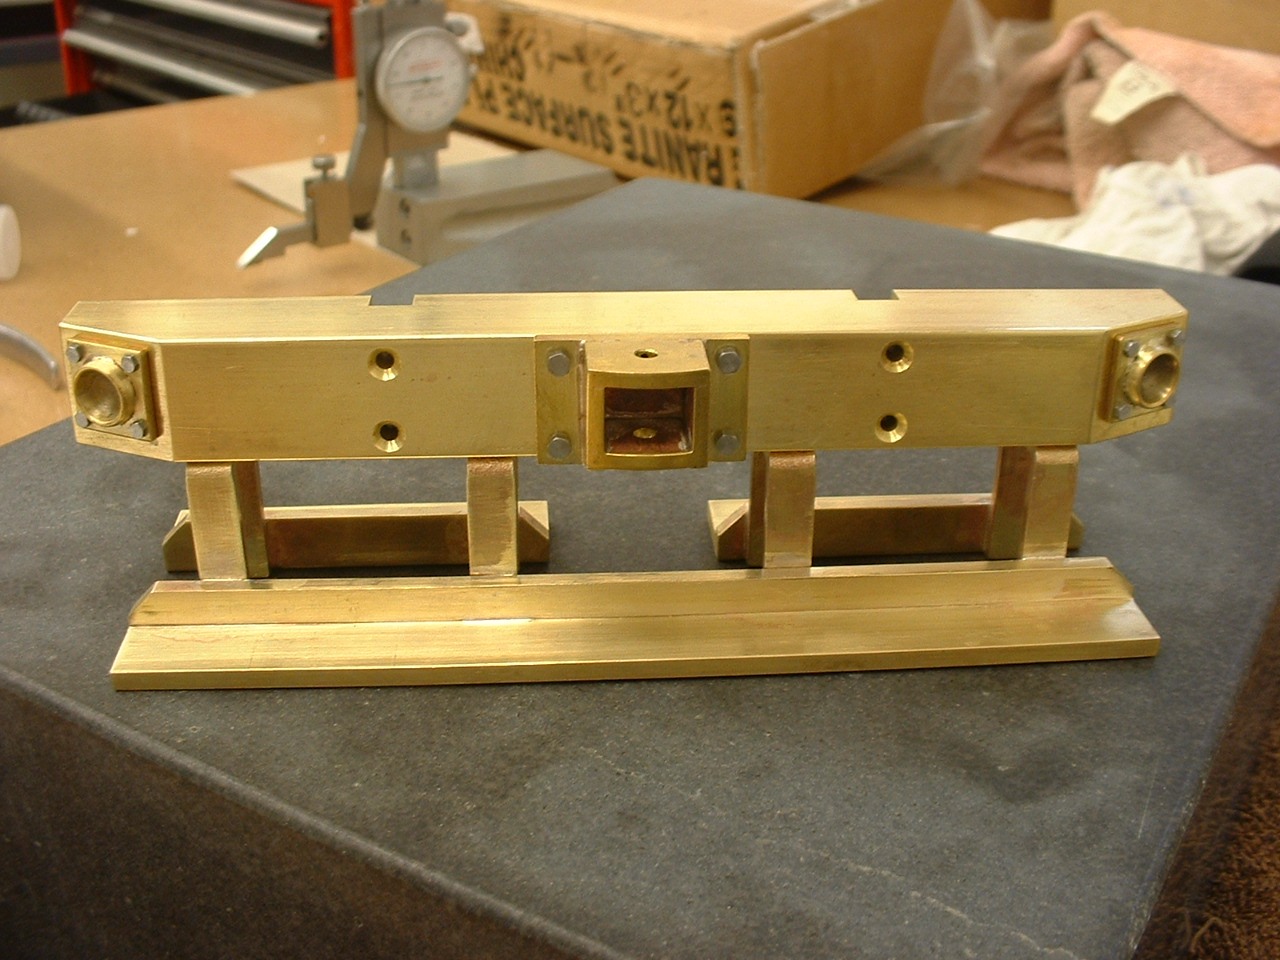 Rear Foot Plate  |
|
|
|
Post by grege on Aug 21, 2009 11:32:06 GMT -5
I was just looking back at your CAD model you started the thread with-- congrats on turning it into reality! Its fun when assemblies come together.
|
|
|
|
Post by whitey on Aug 22, 2009 20:23:23 GMT -5
HI real novice here. But this A3a stirs my interest. But does anyone have plans, drawings, pictures or information as too where I could get something to help in the build. Of the saddle tank.? If that is the right name. thanks Whitey
PS email whanson@plainstel.com
|
|
|
|
Post by whitey on Aug 24, 2009 18:02:00 GMT -5
Sorry I might have missled someone. AS what I was hunting for was anything on the saddle tank etc. I already have the train plans. Again sorry. Whitey
|
|
|
|
Post by GregMiller on Aug 24, 2009 19:04:36 GMT -5
Hi Whitey,
I do not have plans drafted yet for the saddle tank or the coal bunker. Most everything else will be per Kozo's great plans.
My intentions are to construct the saddle tank in a similar manner that the A3 tender is constructed. As for the dimensions, I'll reference the Kalmbach locomotive cyclopedia drawings.
I am many, many, many months away from needing the saddle tank modeled!
Hope that you decide to start construction soon.
Greg
|
|
|
|
Post by whitey on Aug 24, 2009 19:53:33 GMT -5
Thanks Greg. And as soon as I can get my 10L southbend restored (almost done) And I am in the process of converting my bridgeport (type) mill to a 2 Axis CNC ( a gift of a complete Anilam 1100 system) In the meantime I will get started on ideas and material. And hopefull learn omething from all the advice and pictures here. And friends like Tim Vaughan emailing me Lots of help and advice. And again thanks. Whitey
|
|
|
|
Post by GregMiller on Sept 13, 2009 15:00:30 GMT -5
Hello,
Today I cut away the side frames to make way for the boiler. As per the instructions, I did this with a series of holes, then endmill, then hacksaw. My frame rails are from brass. I was surprised that I did not get much deformation, as the plans suggest. I likely got only 6 to 8 thousands of curvature over a length of 6 to 8 inches.
I am curious to hear how much deformation others got when the boiler area was removed from the frames.
Thanks,
Greg
|
|