|
|
Post by kvom on Feb 10, 2011 16:01:09 GMT -5
You can test hardness by seeing if a file will scratch it. OTOH, I've been told by an experienced builder that hardening isn't really necessary as the force on the ratchet is very low.
|
|
|
|
Post by pkastagehand on Feb 11, 2011 9:43:40 GMT -5
You can test hardness by seeing if a file will scratch it. OTOH, I've been told by an experienced builder that hardening isn't really necessary as the force on the ratchet is very low. Yeah, I didn't worry to much about whether it really hardened it much since I'm sure it won't wear out in my lifetime even if it didn't. I know about the file test but didn't want to mess with the finish if it did scratch it. Paul |
|
|
|
Post by pkastagehand on Mar 18, 2011 15:30:08 GMT -5
Here is the latest progress. Been doing too much else so progress has been slow. 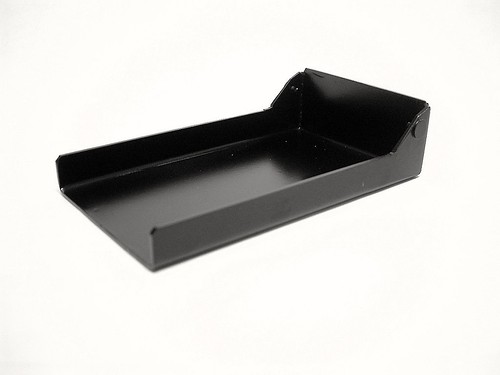 Ash Pan Ash Pan by stagetech56, on Flickr 1 piece, 16 gage steel, formed then corner welded. Had to clean up a few thou in the mill on top edges. May rust out eventually but I figured I could build several of these for the price of one brass one. SS would have cost too. Steel I had lying about. Still needs the pin for latch. Forgot about that; shouldn't have painted it yet since silver soldering that in is going to wreck the paint. Grate is almost done and the rails and latches for mounting the ash pan/grate assemblies are also done. Just need that pin and the spring for the latch. Paul |
|
|
|
Post by pkastagehand on Mar 18, 2011 15:32:37 GMT -5
Also, pump is mostly done: 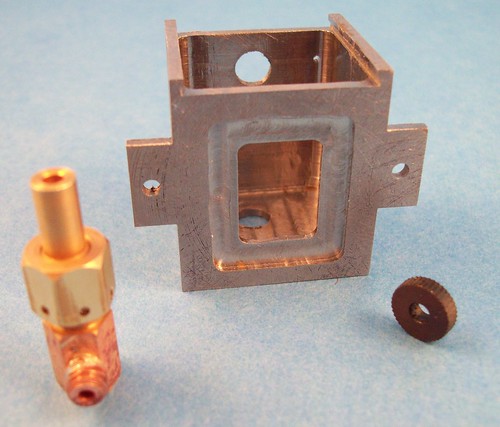 Lubricator parts for A3 Lubricator parts for A3 by stagetech56, on Flickr Since this picture I've glued in the glass, and assembled all the parts. Later I'll do the plumbing to the steam passage. Yes, that is milled from a solid steel block. Paul |
|
|
|
Post by pkastagehand on Jun 23, 2011 12:40:43 GMT -5
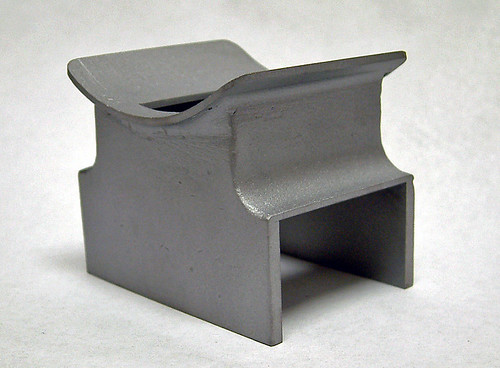 Saddle Saddle by stagetech56, on Flickr Smoke box saddle is finished except for the four holes to bolt it to the smoke box. Paul |
|
|
|
Post by grege on Jun 24, 2011 11:26:31 GMT -5
Nice.
I like how it looks more like a casting.
|
|
|
|
Post by pkastagehand on Jun 24, 2011 12:07:59 GMT -5
Nice. I like how it looks more like a casting. Me too. I made a plywood box with window, light and gloves and bought one of those small sand blasters from Horror Fright for cleaning parts. Gives a nice mat finish which in this case lends itself to a "cast" look. Although a few of filing marks are visible. Paul |
|
|
|
Post by grege on Jun 24, 2011 20:17:30 GMT -5
I've been thinking about making myself that sort of setup for blasting too... your work nudges me a little more in that direction!
|
|
|
|
Post by pkastagehand on Jun 27, 2011 14:44:08 GMT -5
I've been thinking about making myself that sort of setup for blasting too... your work nudges me a little more in that direction! Make sure you make a box big enough to manipulate the gun in. My first attempt was too small. And I wish I didn't have to stop and reload sand so often but since the parts are so small it isn't a terrible problem. If I do anything large I might have to reload several times. If have can get a blast gun that picks up sand from below you could have the box collect sand at the bottom and screen it into a container for recirculation (like the real ones) I just couldn't pass up the price of the small gravity fed unit. |
|
|
|
Post by pkastagehand on Sept 5, 2012 17:46:45 GMT -5
I have been working on the boiler on and off over the last year (mostly off) and I have it ready to mount. I can't see any way for the boiler to be anchored to the frame except through the "tee" into the bottom of the smoke box. Is this correct or did I miss something? I know the cab prevents the back from lifting and one wants freedom for expansion and contraction but it seems funny not to have any rear mounting. Could be it is in there somewhere and I didn't spend enough time looking.
Paul
|
|
|
|
Post by kvom on Sept 6, 2012 7:12:00 GMT -5
The boiler sits on the grate rails and is free to move backwards with heat expansion. It's also restrained somewhat by the piping.
|
|
|
|
Post by grege on Sept 6, 2012 20:00:01 GMT -5
Glad to hear about your boiler!
I've seen some loco's with short horizontal angles on the rear sides of the boiler - held down by a similar piece on the frame to allow thermal expansion, but prevent uplift.
I've rolled mine over a few times to work underneath and haven't noticed any tendency at all for the boiler to flop around or even move.
Greg
|
|
|
|
Post by pkastagehand on Sept 9, 2012 18:18:47 GMT -5
This is the boiler sitting in the frame for its first test fit. Since the boiler is steel and OD is slightly larger than the copper boiler as designed I see that I am going to have to open out the guide yoke tie plate. It does not sit all the way down on the tee. May be other issues I haven't seen yet as well. 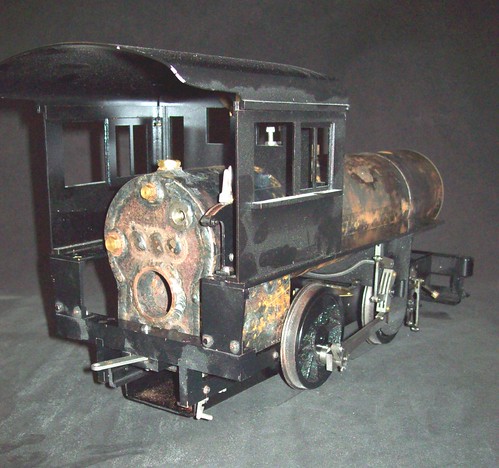 Rear Rear by stagetech56, on Flickr  Front view A3 Boiler in frame Front view A3 Boiler in frame by stagetech56, on Flickr Paul |
|
|
|
Post by kvom on Sept 9, 2012 18:31:48 GMT -5
For what it's worth: builders at my club have commented on my lack of wash outs in the boiler. These are apparently needed for steel boilers but not for copper. On my 1.5 scale boiler it appears that front-back can be accomodated as there is space between the front of the firebox and the rear axle. Front-side to side can be done via a hole in the frame and access through the rear driver spokes.
Something to think about before you go any further.
|
|
|
|
Post by pkastagehand on Sept 11, 2012 19:07:02 GMT -5
Good thought. Thanks.
Paul
|
|

